Showing posts with label Bags/Purses. Show all posts

Thursday, May 7, 2015

Working Girl Laptop Bag

 
Here is another Working Girl Laptop Bag.  The pattern was designed by Anna of Charmed Liebling.   The bag looks sleepy...hummm.  It's leaning because I didn't "stuff" the bag before taking the pic.  I was in a hurry because I needed to get this bag in the mail.    
If you look closely at the above picture, it is a picture of the bag flap.  Instead of using piping, I used my ruffle foot to add thin ruffle around the edges. 
Here is a link to another Working Girl Laptop Bag I made.   

Tuesday, May 5, 2015

Miss Miracle Bag

This is the Miss Miss Mabel bag pattern from Charmed Liebling.   Go to her blog to get info on where you can get this super cute bag pattern.
I love the retro style of this bag!  It's a very roomy bag, too.  
It has a zipper pocket on the bag back to keep keys, phone and or sunglasses handy.  

Sunday, May 3, 2015

Donna Bag

This is the Donna Bag.  The pattern is from Swoon Patterns.  It is the first pattern in the Vintage Subscription.  If you don't want to buy in to the entire subscription, you are able to purchase the patterns individually.  However, the subscription is a GREAT DEAL!!!  The Julie Bag was the second pattern released in this subscription. 


I added the zippered pocket on the back.  But followed the pattern for everything else.  There is a great slip pocket on the front and a zippered pocket inside as well as a zippered closure. 
This bag is such a cutie!  It is a smaller sized handbag....but not too small.  The handles, as made in the bag pictured, will not fit over a shoulder.  They are for holding by hand or over the arm only.  A longer strap could easily be added, if needed. 

Wednesday, October 29, 2014

Crimson and Clover Train Case

This is the Crimson and Clover Train Case designed by Sara from Sew Sweetness
I have a huge fascination with retro styled bags.  This case could be used for many things: make-up, toiletries, jewelry, toys, craft items, etc...
 
 
Here is the inside of the case.  I love all the pockets around the side and the big zip pocket on the lid.
 
I only made few changes to the bag.  I wasn't able to find a 32" zipper in the color was I was looking for.  However, I did mange to find a 30" zipper.  So, I made the bag tab piece a few inches longer. 
I used home décor fabric for the exterior fabric and quilt fabric for the inside.  For the lining pieces, I used SF-101.  In place of the Soft and Stable I used automotive headliner---I think that's what it is.  I bought it at Joann's.  I did use Peltex #70 on the inside of the top and bottom.  I felt it needed a little more stability for when items are inside the case.  It could be because of the larger size of the bag. 
 
This pattern comes in three sizes.  This is the largest size. 
Go visit www.sewsweetness.com to purchase this great train case pattern. 
 

Monday, September 29, 2014

Rockstar Bag

Oh my.....I can't believe how late I am in getting this post up.  I spent almost the entire month of September not feeling well.  I have been doing better lately, but I'm still not at 100%.  I'm sure I'll be there soon. 
This great new pattern came out a little bit ago.  It is the Rockstar Bag designed by Sarah at Sew Sweetness.  Here is her blog post:  https://sewsweetness.com/2014/09/rockstar-bag.html
This is the front of the bag.  I made this from an outgrown pair of my son's jeans and faux leather.  I added the bow.  It is from Michelle Patterns. 
Above is the back of the bag. 
Above is the inside of the bag.  There are two zippered pockets.
 
The cute bottom!  I guess purse feet crack me up!  LOL! 
 
Click on this link to go get yourself this awesome pattern. 


Monday, September 1, 2014

Summer Moves On Hobo Bag

This is the Summer Moves On Hobo Bag Pattern designed by Anna from Charmed Liebling.  This bag contains so many pockets!  Gotta LOVE all them pockets!  This bag has lots of room.  It also sits comfortably on your shoulder to carry.   
This is the front of the bag.  It not only has two great sized slip pockets, there are also two zip pockets on the front of the slip pickets!  Oh yaaaa!
This is the back of the bag.  It has two slip pockets.  
The view from the top of the bag.   
A view inside the bag. 
This bag would be great to use when traveling.  Especially, if you are like me and end up carrying everyone else's stuff.  It would also make a great diaper bag or a bag to take on a day of shopping with the girls or at a farmers market.     
Head on over to www.charmed-lieblig.com to grab this fun pattern. 


Saturday, August 30, 2014

Crossbody Bag From Vogue


Hey Everyone! 
I didn't mean to disappear for a while.   My computer crashed.  I've been piecing myself back together.  At least that is how I feel.  :)
 
I made this bag as a gift awhile ago. 
This is a cute, good sized cross body bag.  I am thinking that pocket up top was sized to hold a flip cell phone.  HA!  I added a ruffle around the flap of the pockets.  Just because...OKAY!  I was playing with fabric and a ruffle foot.  There I said it!  :) 
 
 
Love this zip pocket in the back.
Here is the inside of the bag. 
That's all for now.  Have a great day! 

Wednesday, July 16, 2014

Lapin Noir Bag Part Two

Here is another Lapin Noir Bag I put together.   The bag pattern is designed by Sew Sweetness.  

I needed a bag about this size that had both shoulder strap and cross body handles.  I also wanted to use this number fabric I had in my stash.  I, again, added bows made from the “Bows" pattern from Michelle Patterns.  I can't seem to stop using these cute bows!  I might need to seek help.  Haaaa!


This is the back of the bag.  The zippered pocket and the little pocket--perhaps for cell phone--is WONDERFUL!
The inside of the bag.  I almost like these fabrics more than outside fabrics.  Can you say POLKA DOTS?!
Have a great day!


Tuesday, July 1, 2014

Melissa Bag

This cute bag is the Melissa Bag made from a pattern by I Think Sew.

I actually pulled out my stamps (from paper crafting)  and stamped on fabric.  The stamps are from Paper Trey Ink.  


I just finished stamping the flower and I was holding up the ruffle fabric to get an idea of how it would look when I got the idea to have alternating polka dot ruffles.  That's how I ended up cutting out and making two bags.  Why not....right? 

I guessed-from examining the pictures-that the handle was going to be too short.  I added a few inches.  Next time I think I'll add a few more inches so it will not be so tight on my shoulder. 
In real life the color of the fabric is somewhere between the yellow that the outside pictures portray and the white that the inside pictures portray.    
I moved the zipper pocket to the outside back.  I found that I like a pocket here on my bags.
The inside of both bags are the same.   They each have 4 slip pockets (2 on each side).

Thursday, June 26, 2014

Updated City Slicker Bag

I wasn't happy with the front pocket flap on the original Ruffled City Slicker Bag I made. HERE is the original post.  So I made a few changes.  
I removed the original ruffled front flap.  I didn't like how the ruffles on that flap turned out.  I had to 're-open the turning opening then very carefully sew the new flap on.  
Again, I used the Bow Pattern from Michelle Patterns.  

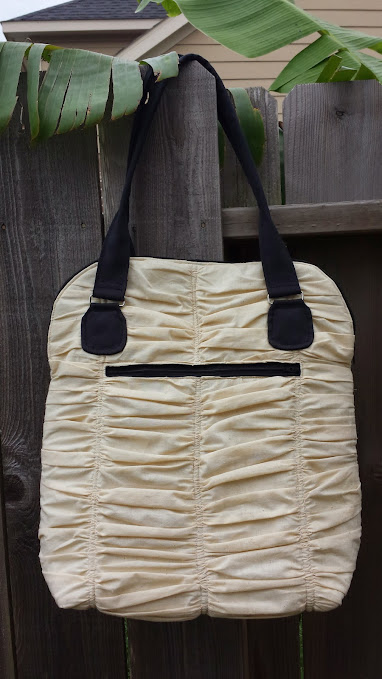
Ruched Bye Bye Love Bag

Here is another version of the Bye Bye Love Bag. The pattern is designed by Sara at Sew Sweetness.   Here is the other bag I made.  I decided to try something I haven't done before.  I ruched  the fabric.  I guessed on how to do this technique.  I love how it turned out! 

 
Bag Front

Back of bag with zippered pocket
 

I added a rectangle of cross stitch mesh to the base of the bag to make it a little more stable.  I used auto upholstery foam as my interfacing.  I think the size of the bag and the extra sewing (ruching, pockets, flaps) made it a little more floppy.
I, again, added bows from the Bows Pattern by Michelle Patterns.  I can't get enough of these cute bows! 
I was browsing on Pintrest and came across this great idea to print on fabric.  You basically print out your design on wax paper from your printer.  Then iron and then burnish this on your fabric.  Well, it only sort of worked.  I added a text image of a French address on one of the pockets. It is clearer in real life. 
Inside of the bag.  With 4 large slip pockets.


Sunday, June 15, 2014

Ruffled City Slicker Bag

Here is another City Slicker Bag.  The pattern is designed by Chris W. Designs. 
Shortly after finishing the last City Slicker Bag I wanted to sew ruffles.  So, I did.  I figured, why not make the City Slicker Bag.  Oh!  All right! Everything was still sitting out, and I started to play. 

Here is the front of the bag.  I added the ruffles to the sides of the bag and I used lace on the front and back panels.   I updated this front.  See this post.
I will include a very rough tutorial on how I added the ruffles on this bag.  So, bear with me.  :)
On the front pocket, I trimmed 3/8" from the outside of the front pocket flap.  I then should have taken a strip of fabric that was 1 1/2" wide by double the length of the outside edge of the flap.  I say should have as my fabric was a little bit wider and I'm not exactly happy with it.  Anywho, place wrong sides together matching the long edge and press.  Then run a basting stitch close to the raw edge.  Pull the bobbin thread and ruffle the strip of fabric.  Pin ruffle around front flap piece starting and stopping 3/8" from the top on each end.  Sew 1/8" from raw edge.    Finish front flap as directed. 
 
Here is the back of the bag.  I think I'm now addicted to welt pockets.  :)


To add ruffles to the side pieces, I cut several strips of fabric that were 4 1/2" wide.  The fabric I used is 54" wide.  I **think** I cut (6)  4 1/2" wide strips--yep, I am suffering from a case of CRS.   Take two strips, match short ends and sew together using a 1/4" seam allowance.  Press this seam open.  Add another strip to the other end.  Continue this process until all strips are sewn together.  Then place the long strip right sides together matching long raw edge.  Sew all along the long raw edge using a 1/4" seam allowance.  Turn this right side out and press.  Run a long basting stitch close to the top long edge you sewed together previously.  If you feel the need you could run two basting stitches slightly apart.  I didn't.   You will pull the bobbin thread(s) to make the ruffles in a little bit.   
Now, take one side panel. From the top curved edge, measure and mark a line that is 1 1/2" away from the top edge.  Note: your line will be curved.  Continue marking curved lines 1 1/2" from previous line all the way to the bottom.  Note: there will be less than 1 1/2" from bottom line to bottom of the side panel. 
Take your long strip of fabric and roughly measure along the bottom drawn line on the side panel piece.  Mark this length (I just held it with my thumb) then double this length and cut.  Pull the bobbin thread and ruffle up your strip of fabric so that it is somewhat even.  Pin this piece along the bottom curved line.  Even out ruffles if needed.  Then sew into place along the curved line.  Since there is a lot of fabric hanging down I went ahead and basted the fabric strip in place from the  bottom line, to the bottom corner, along the bottom to the other corner, then up to the line.  I then cut the fabric to match the panel piece.  Continue adding ruffle pieces to all the lines as described above with one exception.  I waited until all ruffle lines were attached before basting along both sides of the side panel piece and trimming the ruffles to match the side panel piece. 
Whew!  I hope that was somewhat clear.  Please ask if you have any questions.   
 
The denim accent fabric I used is from my son's out grown jeans.  I guess the upside of having a still growing 6'2" young man is that I have lots of outgrown denim around.  Although, I have to admit it is just not right that I have to look up to talk to him.  


Enjoy your day! 

Thursday, June 12, 2014

The City Slicker by Chris W. Designs

Meet Ms. June from the Bag of the Month Club.  I can't believe that this is the last month!  I'm sad!  When the first of the month rolls around, in a few weeks, (sniff, sniff) there will be no "little bit of happiness" in my e-mail. 
This is the advanced version of the City Slicker Bag designed by Chris W. Designs.  It is the first time I've used a pattern from Chris W. Designs.  WOW!  What a great pattern!  There are so many details to the pattern.  If you don't want all the pictures....NO PROBLEM just go with the included text only version of the pattern.  If you are like me and sometimes would rather measure and cut your square or rectangle pieces instead of using a pattern piece...those dimensions are given, too. 
This is the front of the bag.  The brown and raspberry fabric are fabric I've had around for a while.  I've also had the print fabric, which is Blush by Basic Grey, several years.  I've been a HUGE Basic Grey fan from my paper crafting days. 
I wanted to use a darker color for the handles.  After I finished the outside of the bag, I thought it need another touch of the printed fabric for balance.  So, I added a sash that I tied into a bow. 
Here is the back of the bag. It  was my first time making a welt pocket.  The instructions on the pattern are clear.  I, however, decided to search for a video. I was having a mental block.  This is the video I watched.    I'd bought an online class to learn how to make welt pockets several months ago.  Do you think I turned to this class for info.?  NOPE!  Oh!  I'll get to it!  Just another thing I need to add to my "To Do" list.   :)
Here is the beautiful inside of the bag.  I LOVE all the pockets!  SO GREAT! 
This is also the first time that I've used something similar to  the By Annie's Soft and Stable.  I believe that's the name.   I have not been able to find the By Annie's foam.  I did finally find some auto headliner foam.  WOW!  What a difference!  Normally, I'd use really stiff interfacing that is NEVER easy to sew.  Especially on this bag!  I know my fingers would have been black and blue and scabbed over right now...maybe even invented a few new words.  I also  have to talk nice to my machine to get it to sew through all those thick heavy layers.   It was a dream to sew with this auto headliner foam! 
I LOVED having the "Bag of the Month Club."  I hope there will be another one sometime in the future.  Thank you to everyone that created the club and put it all together and to all the amazing designers that participated!  Through this club, I learned about some fabulous new (to me) bag designers.  I learned several new techniques, as well.  Thank you!
Until next time....

Saturday, May 31, 2014

Kennedy Bag (Bag #2)

This is the Kennedy Bag from Sew Sweetness.  It is available as a free pattern on the Sew Mamma Sew Blog.  This is a great bag!  In fact, this is the second Kennedy Bag I've made.
I've added bows to this bag.  These bows are a pattern from Michelle Patterns.  I have used this pattern a LOT!
This is the back of the bag.   I've used fabric from IKEA, again.  :)  I love this fabric!
This is the inside.  There is a big zippered pocket on one side and a divided slip pocket on the other.
This is the bottom of the bag. 
I should also mention that the strap is adjustable.   
This is the side.  I used ties on the side for a fun touch. 
Enjoy your day!

Tuesday, May 27, 2014

Suzy's Sack

This cute little bag is made with the Suzy's Sack pattern by This & That.  I made this bag to coordinate with this tote bag.  
This is the back of the bag...notice how this bag can clip to most anything.  I like that! 
This is the bag with the zipper open.